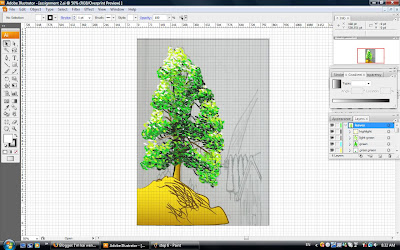
First, as usual I took a picture of my sketch and then I print screen to paste it in paint and save it,import it to illustrator.
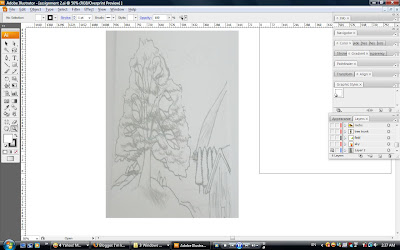
Then I make this layer as a
template,then i show
ruler as well as
grid to help me in giving a more appropriate drawing.
After that,I make another layer called the
tree trunk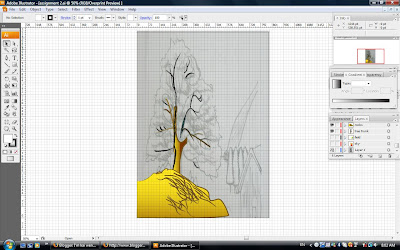
and then the rocks which is the bottom part of the picture.how do I draw the trunk and those sticks? under
brushes,I choose
artistic( artistic charcoal pencil) with the stroke of 1pt and the thickness that I like.and I put gradient of dark brown to light brown for the trunk that I have selected to show the light source.
The other layer-rocks,simple,I use the same
brush tool,same
gradient colour and I draw the outline.And the on top is what it becomes...After that, I draw a few lines with the same brush tool on this layer,meaning on the rocks to show the rough surface of rocks.
Next,another
layer named leaves.In this layer, I make another
sub-layer called the dark green.Using the brush tool with the
Artistic charcoal pencil that I have chosen for the trunk and rocks,I then select the dark green colour that I would like to use to draw the leaves.
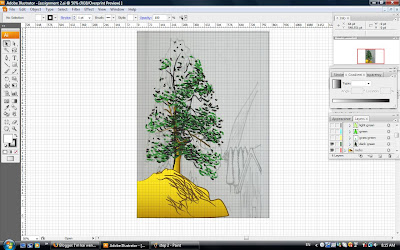
this is what it looks like.
Then another
sub-layer-the grass green, using the same
brush of the same type
(artistic charcoal pencil).Lighter green is used this time.

another
sublayer again-green.Same technique...

another
sublayer again-light green
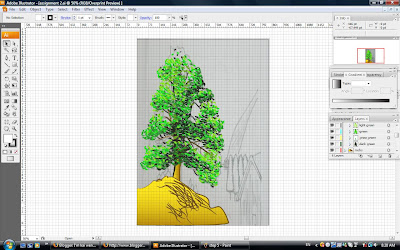
Next,another
sublayer as well-highlight.using a light yellow and white to show the toning of the leaves and also the light source.
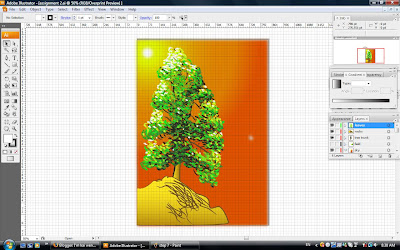
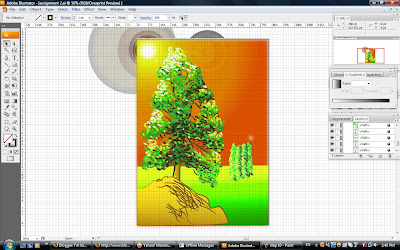
This is the final out look of the tree.
Next, I make another
layer called the sky where I used the
gradient with the toning of orange to yellow and to white as the sunlight.This is also the background of the picture.
After that, I use the
flare tool
to draw the effect of sunshine....looks better this time.
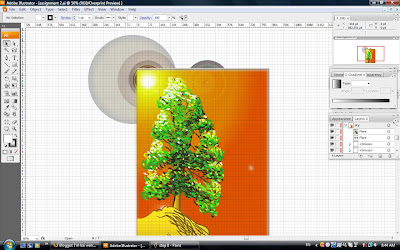
Then, make another layer named field as the ground of the scenery.
I draw a line and I use
gradient of the toning of colour of green to yellow as the field of grasses.
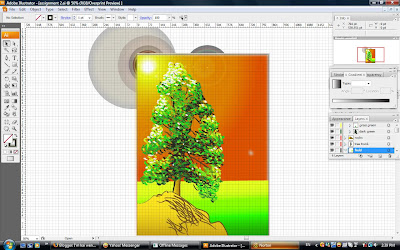
then, I use
brushes of the type called
artistic charcoal pencil to draw trees behind and at further distance from near.
Next is drawing the house using
pen tool and apply colour from the colour guide.
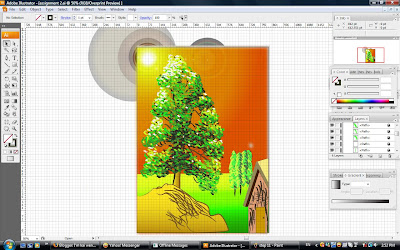
After that, I draw the rocks like mountain behind the trees and the house using pen tool
. choose the colour of orange and make a toning to yellow colour and make a
texture of canvas to show the rough surface of the mountain.I choose that under effect and the light source is from top.
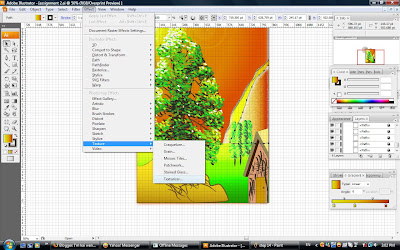
The toning is the reflection of the sunlight when sun sets.same goes to the other mountain behind it. Is just the colour of toning is yellow to white using
gradient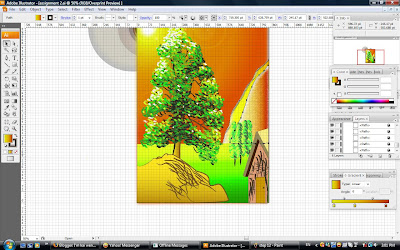
this is the final picture of my assignment 2.


 The first picture is using my subject(tree)and duplicate it according to distance to show the perspective of the land with trees and the warm sky that shows shinny, fresh day....more attractive though as it also shows the future of the earth as more trees are planted around us....cool.


 This is the final out look of the tree.


 After that, I draw the rocks like mountain behind the trees and the house using pen tool. choose the colour of orange and make a toning to yellow colour and make a texture of canvas to show the rough surface of the mountain.I choose that under effect and the light source is from top.
 this is the final picture of my assignment 2.


